Android MotionLayout: Creating the Twitter splash screen in the simplest way possible (Part I)
Remember the Twitter’s “oh so famous” splash screen that everyone talked about and had their version to imitate it? It’s now easier than ever to achieve that with the new MotionLayout from the Android Jetpack library.

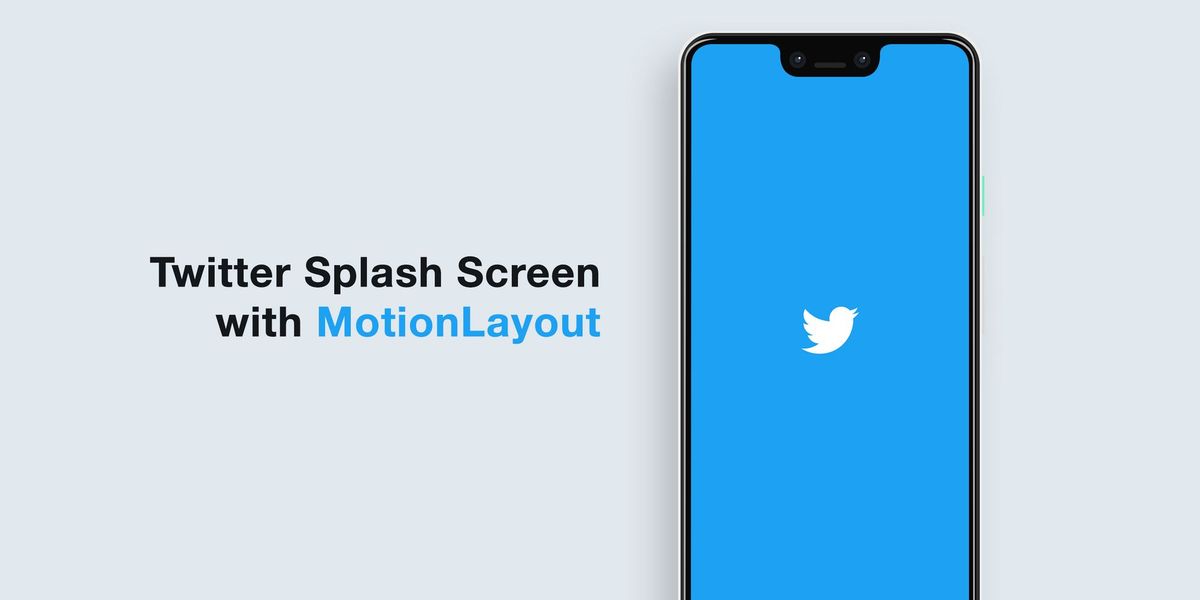
Remember the Twitter’s “oh so famous” splash screen that everyone talked about and had their version to imitate it? It’s now easier than ever to achieve that with the new MotionLayout from the Android Jetpack library. And that’s what we’ll create in this post and in addition, learn some basics about how MotionLayout works.
For those who wonder about the Twitter splash screen, here’s the animation that we’re going to achieve in this post:
Background ✍️
- MotionLayout is a subclass of Android ConstraintLayout which allows you to animate just about any view or layout in the app very easily.
- Good news is that it is backwards-compatible to API level 14 (Android 4.0), so the animations you create can pretty much work on all Android versions your users might use.
- Even though you can create the MotionLayout animations with Android Studio < 4.0, there are better tools in AS 4.0 that I’d strongly recommend to use when you work with MotionLayout.
- While it is still in beta, it’s not widely adopted yet but I can already imagine the unique interactive animations people will come up with after it’s in stable release!
Prerequisite ☝️
For this tutorial I’ve used Android Studio 4.0 Preview because of the better tools that they’re introduced for MotionLayout but the code I provide can work with older versions as well.
Project Setup ⚙️
To get things started, here’s what you do:
- Open a new project.
- Select an Empty Activity Project Template. This would create an empty screen with an Action Bar.
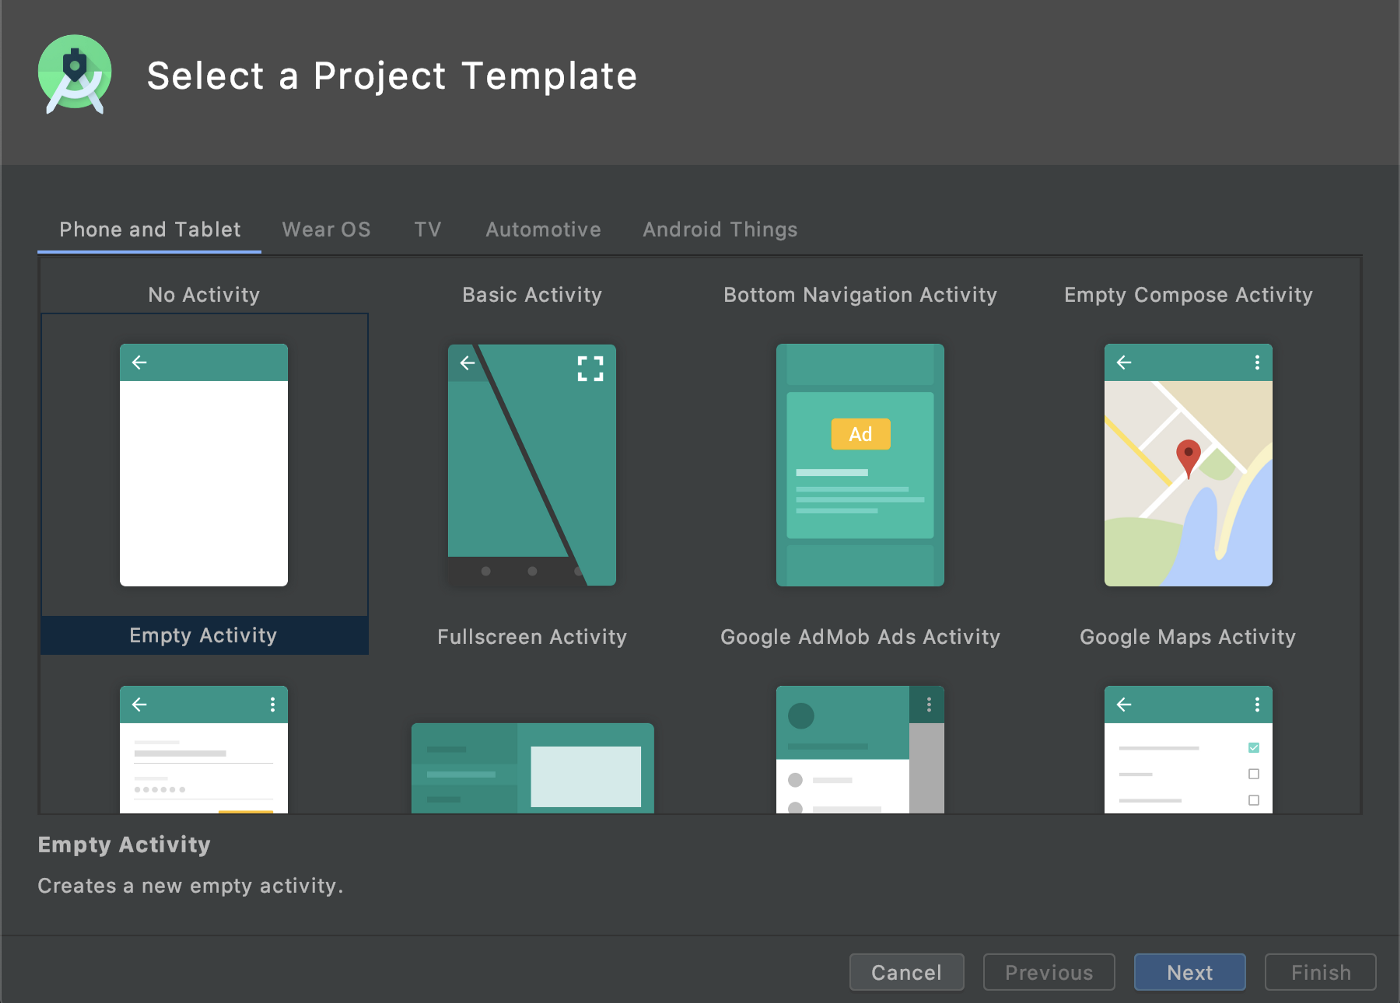
3. Type any name for the project and select Kotlin from the language
4. Click Finish.
5. Run the project to see the look of your initial app.
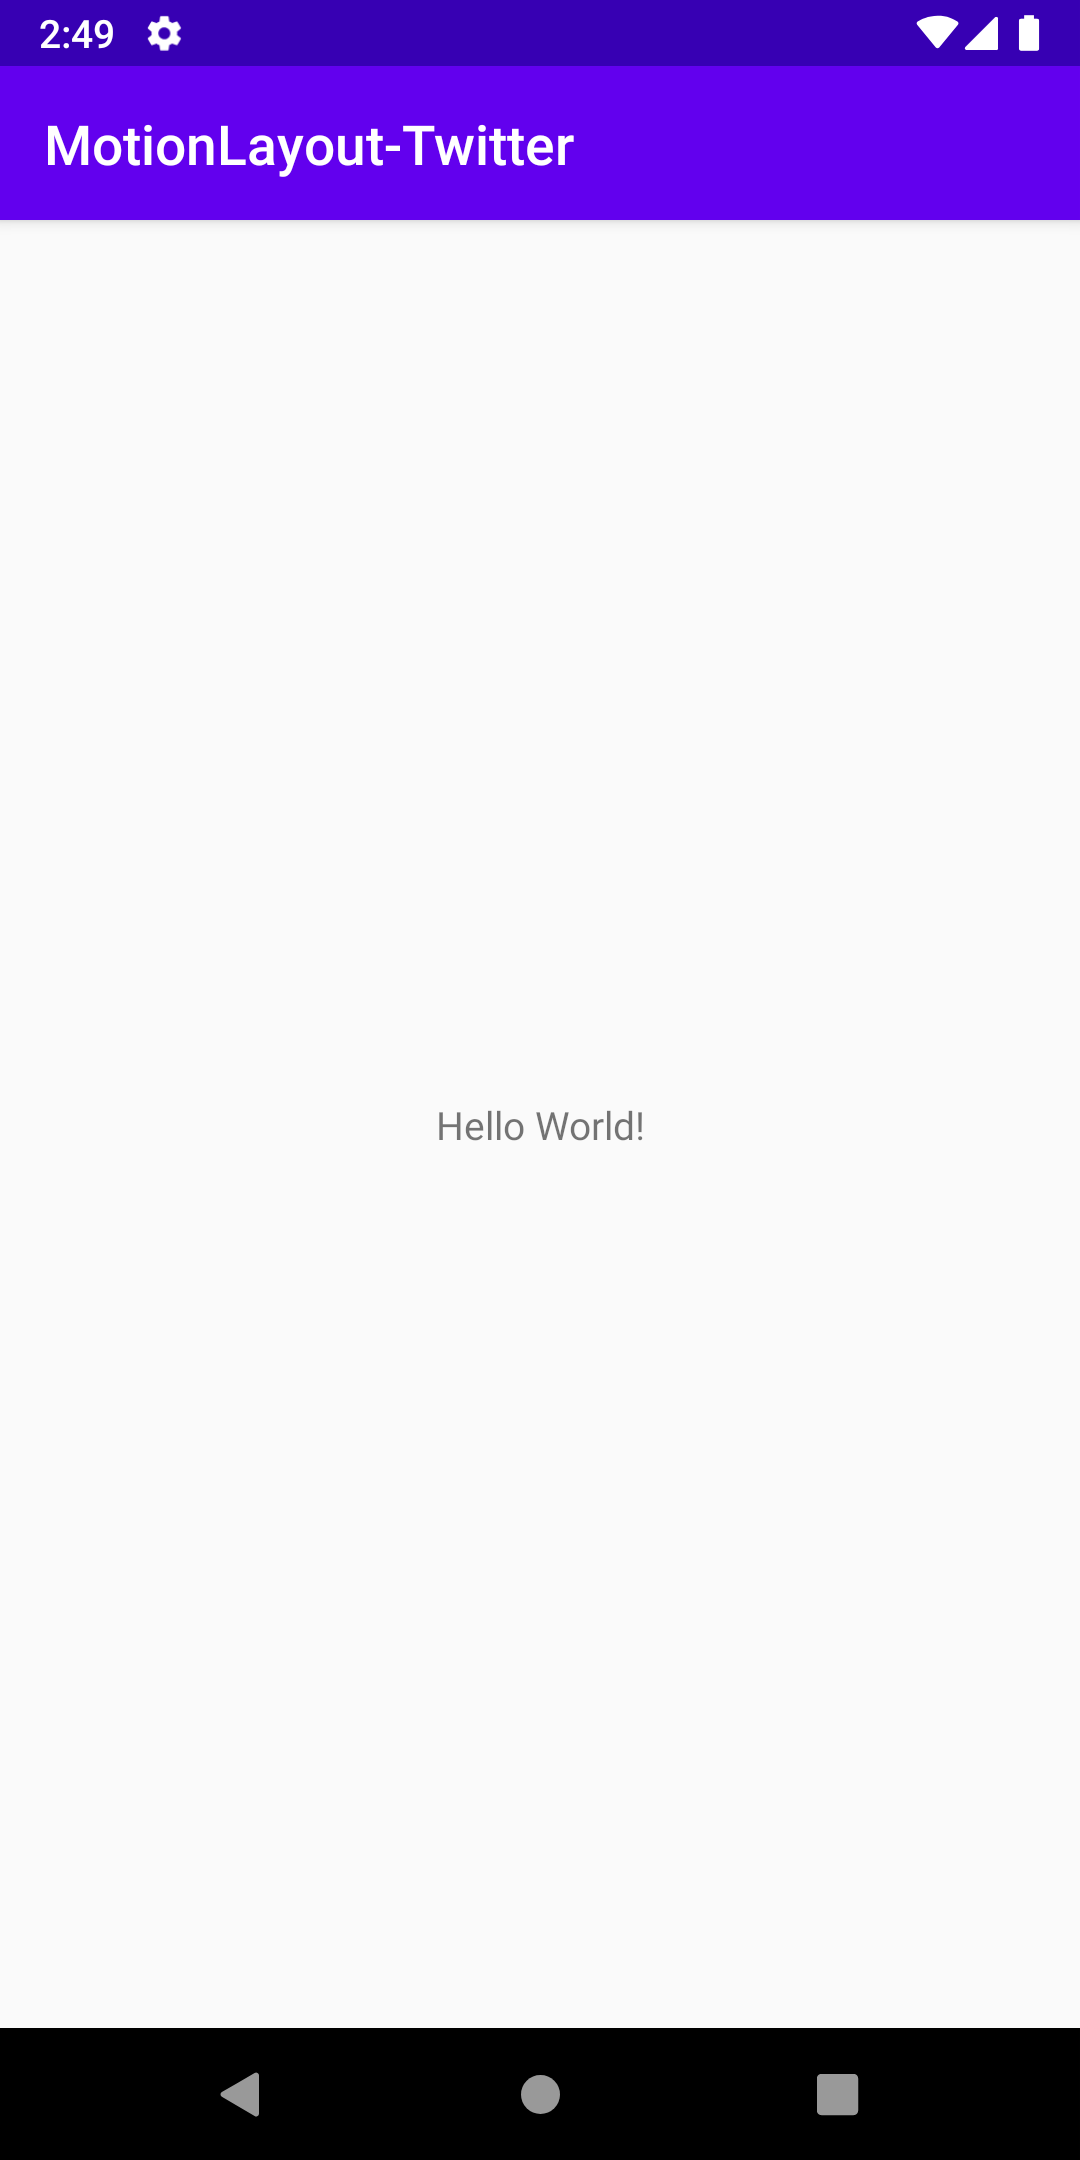
Since this post is just for demo purposes, we’ll try to create the splash using our MainActivity, which currently looks like it needs some cleaning up and styling to do.
Cleanup:
To get rid of the toolbar, navigation bar, status bar and text and add color to the background, do the following:
- Open
styles.xml - Replace the base theme’s parent from
Theme.AppCompat.Light.DarkActionBartoTheme.AppCompat.Light.NoActionBar. (If you run the app at this point, you’ll see that the action bar / toolbar is gone) - Add new customizations for your app by setting
android:windowFullscreento true (which hides the status bar) and settingandroid:backgroundto our primary color (which adds a background color to our activity)
4. Open activity_main.xml and remove the TextView from the layout to remove the “Hello World!” text.
6. Now in your MainActivity.kt, add the following lines to hide the system navigation bar (If you copy and paste the lines and see Unresolved reference build errors, click on the unresolved objects and press Alt + Enter to add the reference):
6. Run the app.
You now basically see an empty screen with our color primary as the background:

Add Twitter assets:
We need to style just a few things before starting with animation: Twitter’s primary color as the background and its logo. You can find the latest brand resources at: https://about.twitter.com/en_us/company/brand-resources.html
To start with:
- Open
colors.xml - Change
colorPrimaryandcolorPrimaryDarkto Twitter’s primary color.
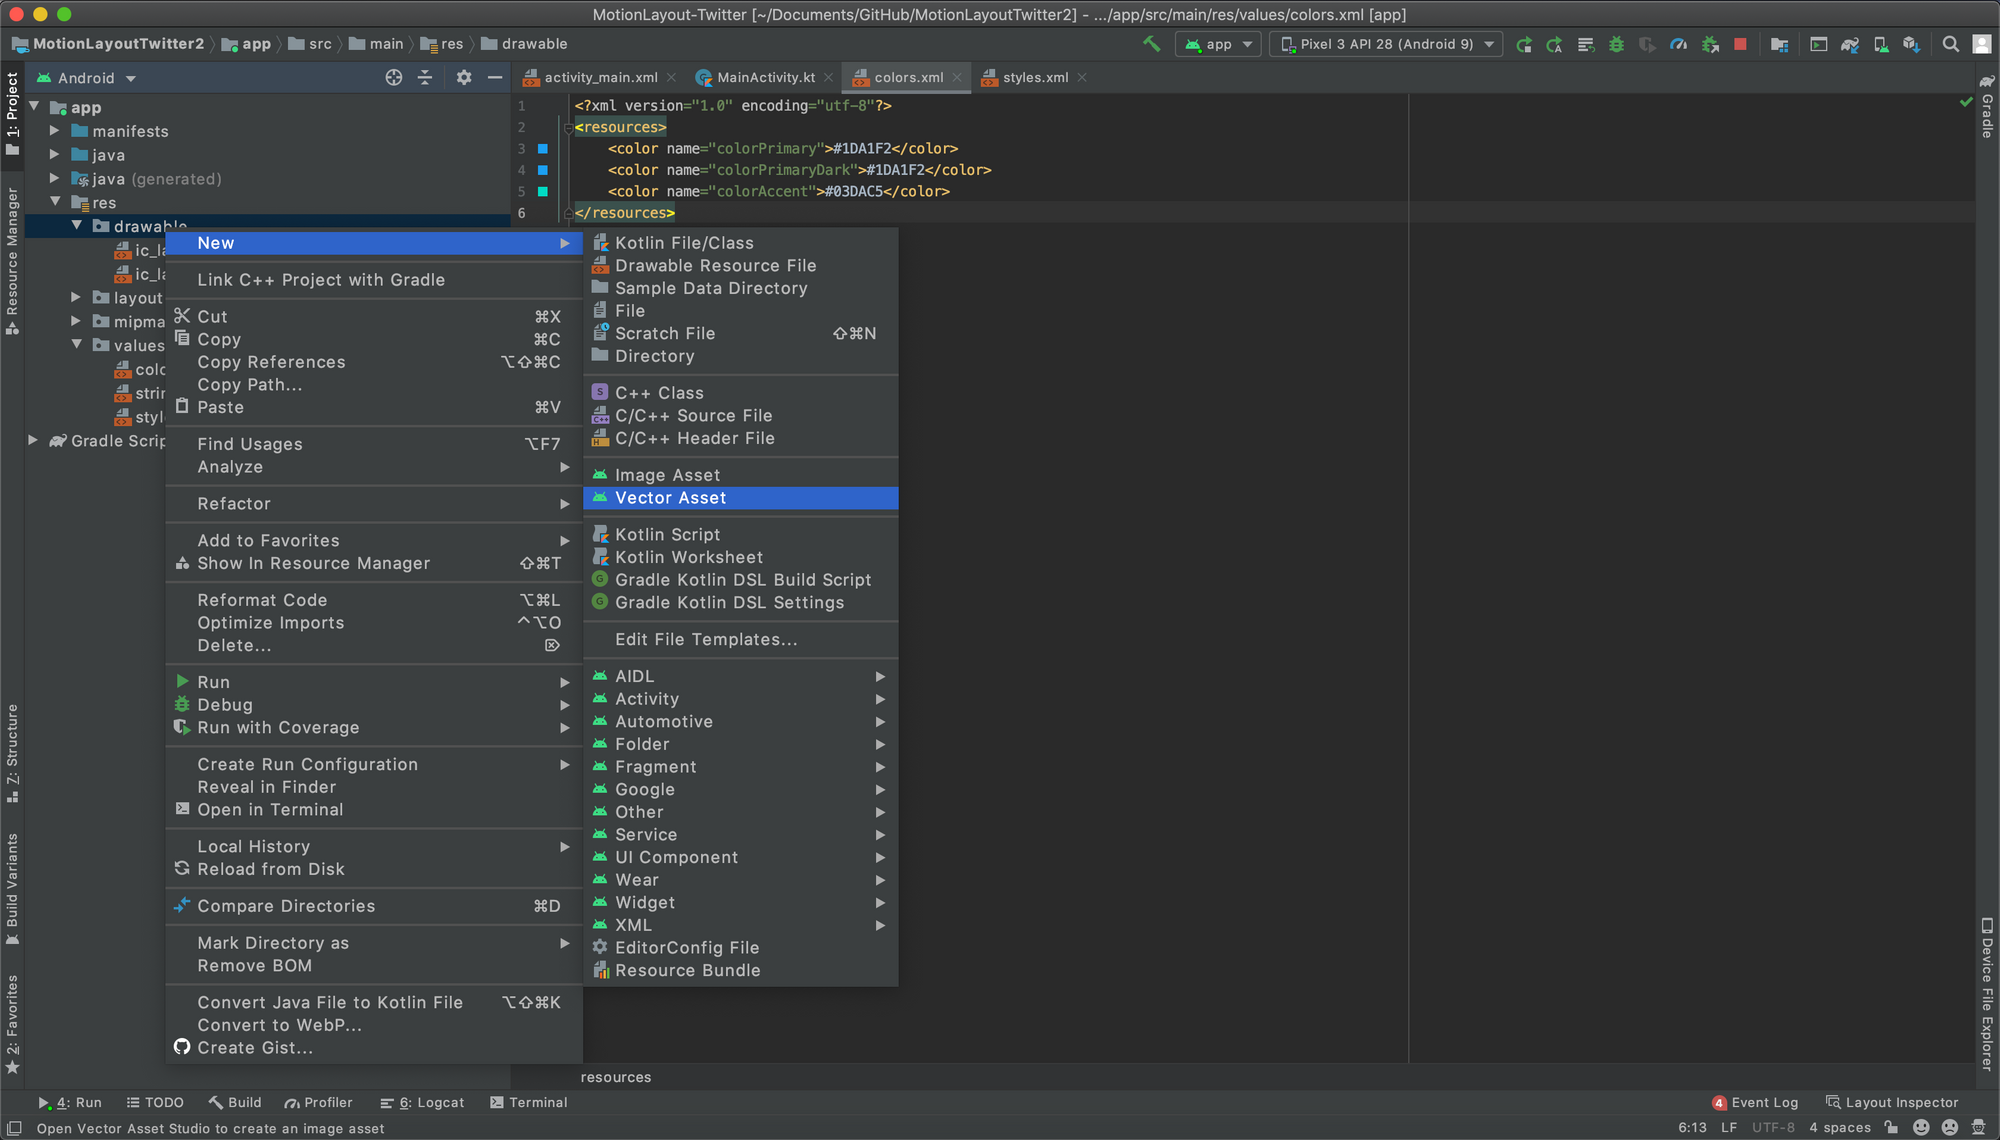
3. Add the Twitter logo as a new Vector Asset.
4. Open activity_main.xml, and add the logo as an ImageView with a width and height of 128dp.
5. Run the app and see the new changes.

Adding Motion 🚴♀️
Updating ConstraintLayout:
Since MotionLayout is a part of ConstraintLayout and currently only works in v2.0, in order to use it, we first need to update our ConstraintLayout dependency:
- Open
build.gradle (Module) - Add this line in the dependency section or replace your
constraintlayoutdependency with:
Note: At the time of writing, the latest ConstraintLayout beta version was 2.0.0-beta4, but you can use any latest stable release you want from Google’s Maven Repository or MVN Repository.
3. Sync the project.
Adding Motion:
To finally bring the little bird into life, there are a few easy steps that you need to do (remember that these steps only work in Android Studio 4.0 and if you use an older version, you’d need to manually make changes to your XML files):
- Open
activity_main.xml. - In the Design tab, under Component Tree, right click and select Convert to MotionLayout.
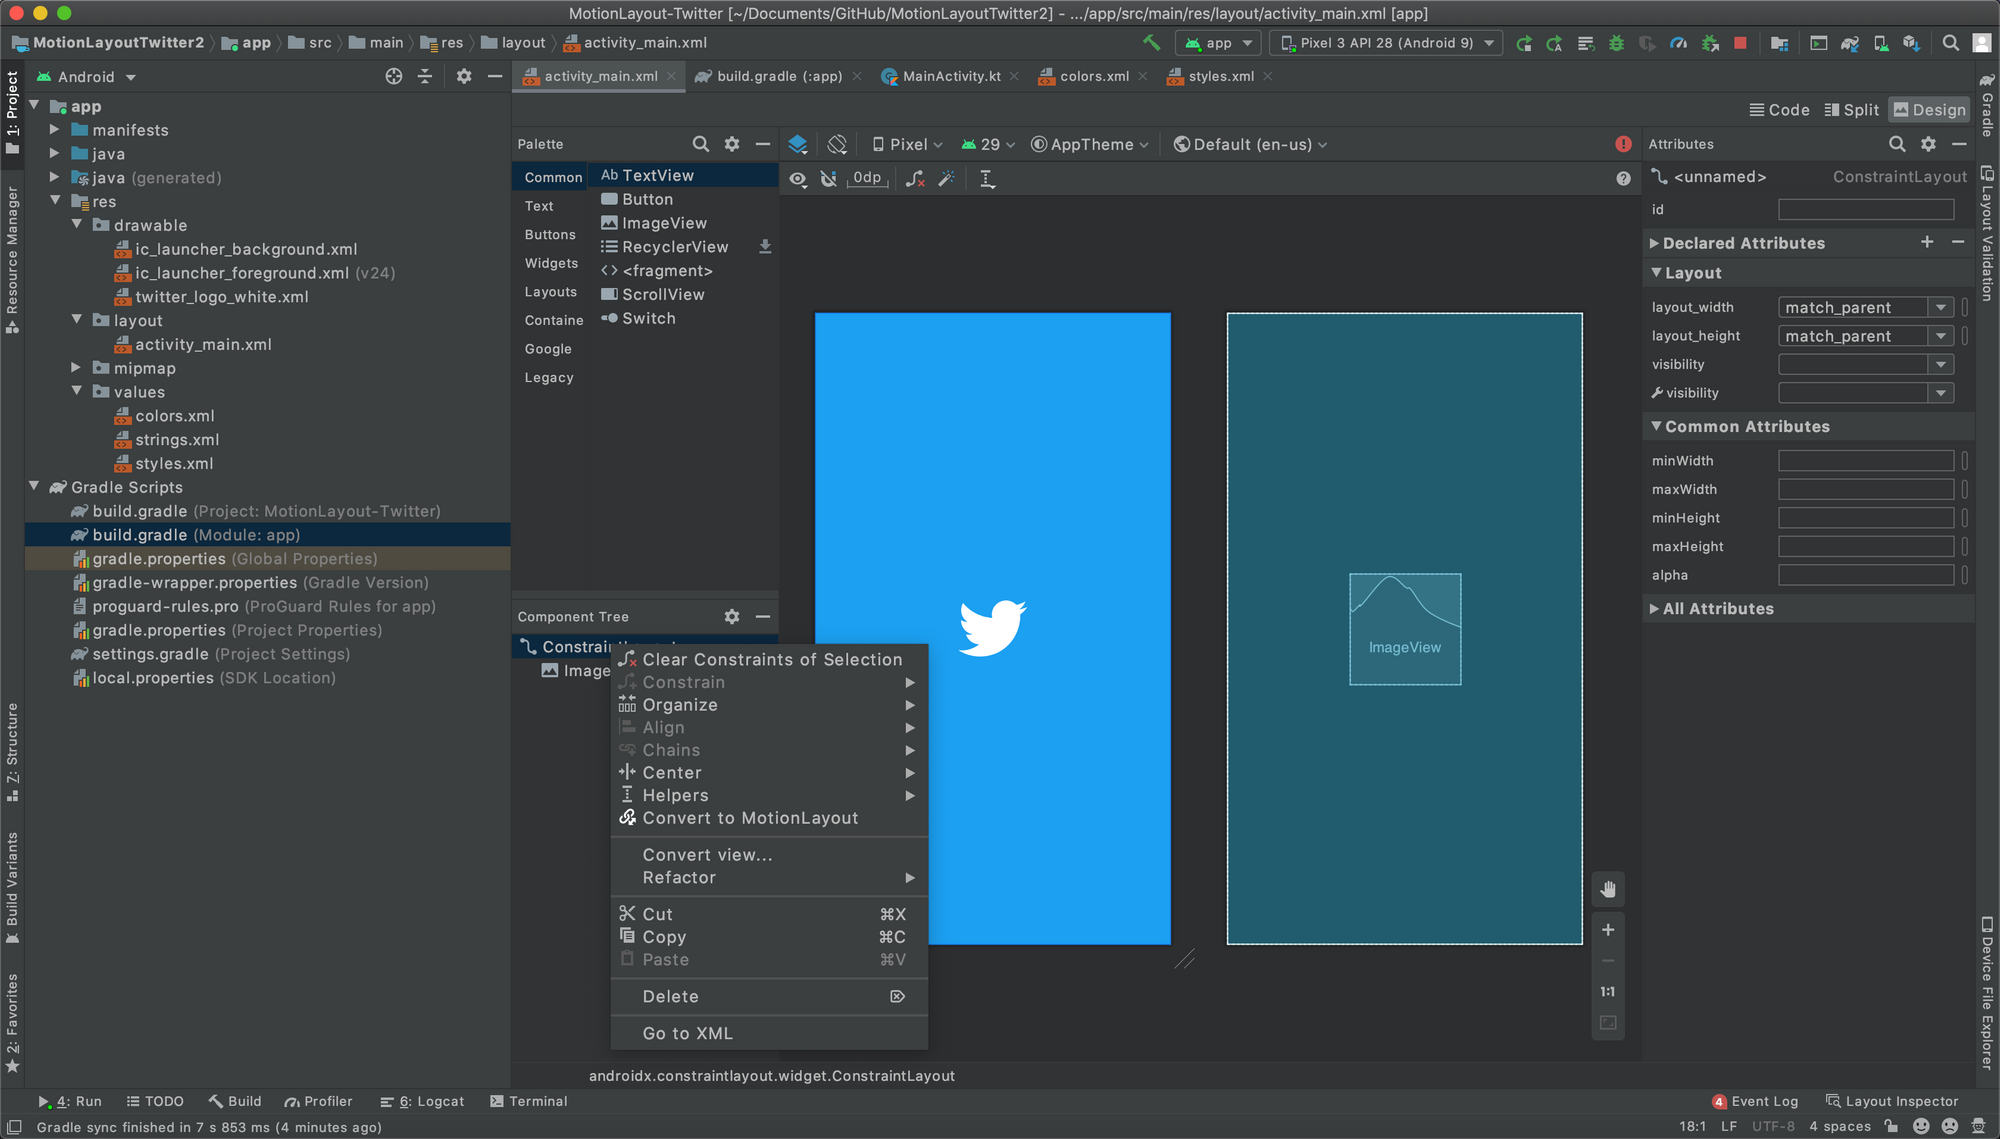
This should automatically change our parent layout from ConstraintLayout to MotionLayout, show a slightly different Design view, and also add a new activity_motion_scene.xml under xml directory.
Now, in order to observe the original animation in slow mo, you’ll see that there are only a few things that’s going on with the logo:
- It is scaled down for 1–2 sec.
- The scaled down logo rests for 0.5–1 sec.
- Finally, it is scaled up to fill the screen.

In order to create that timeline, do the following:
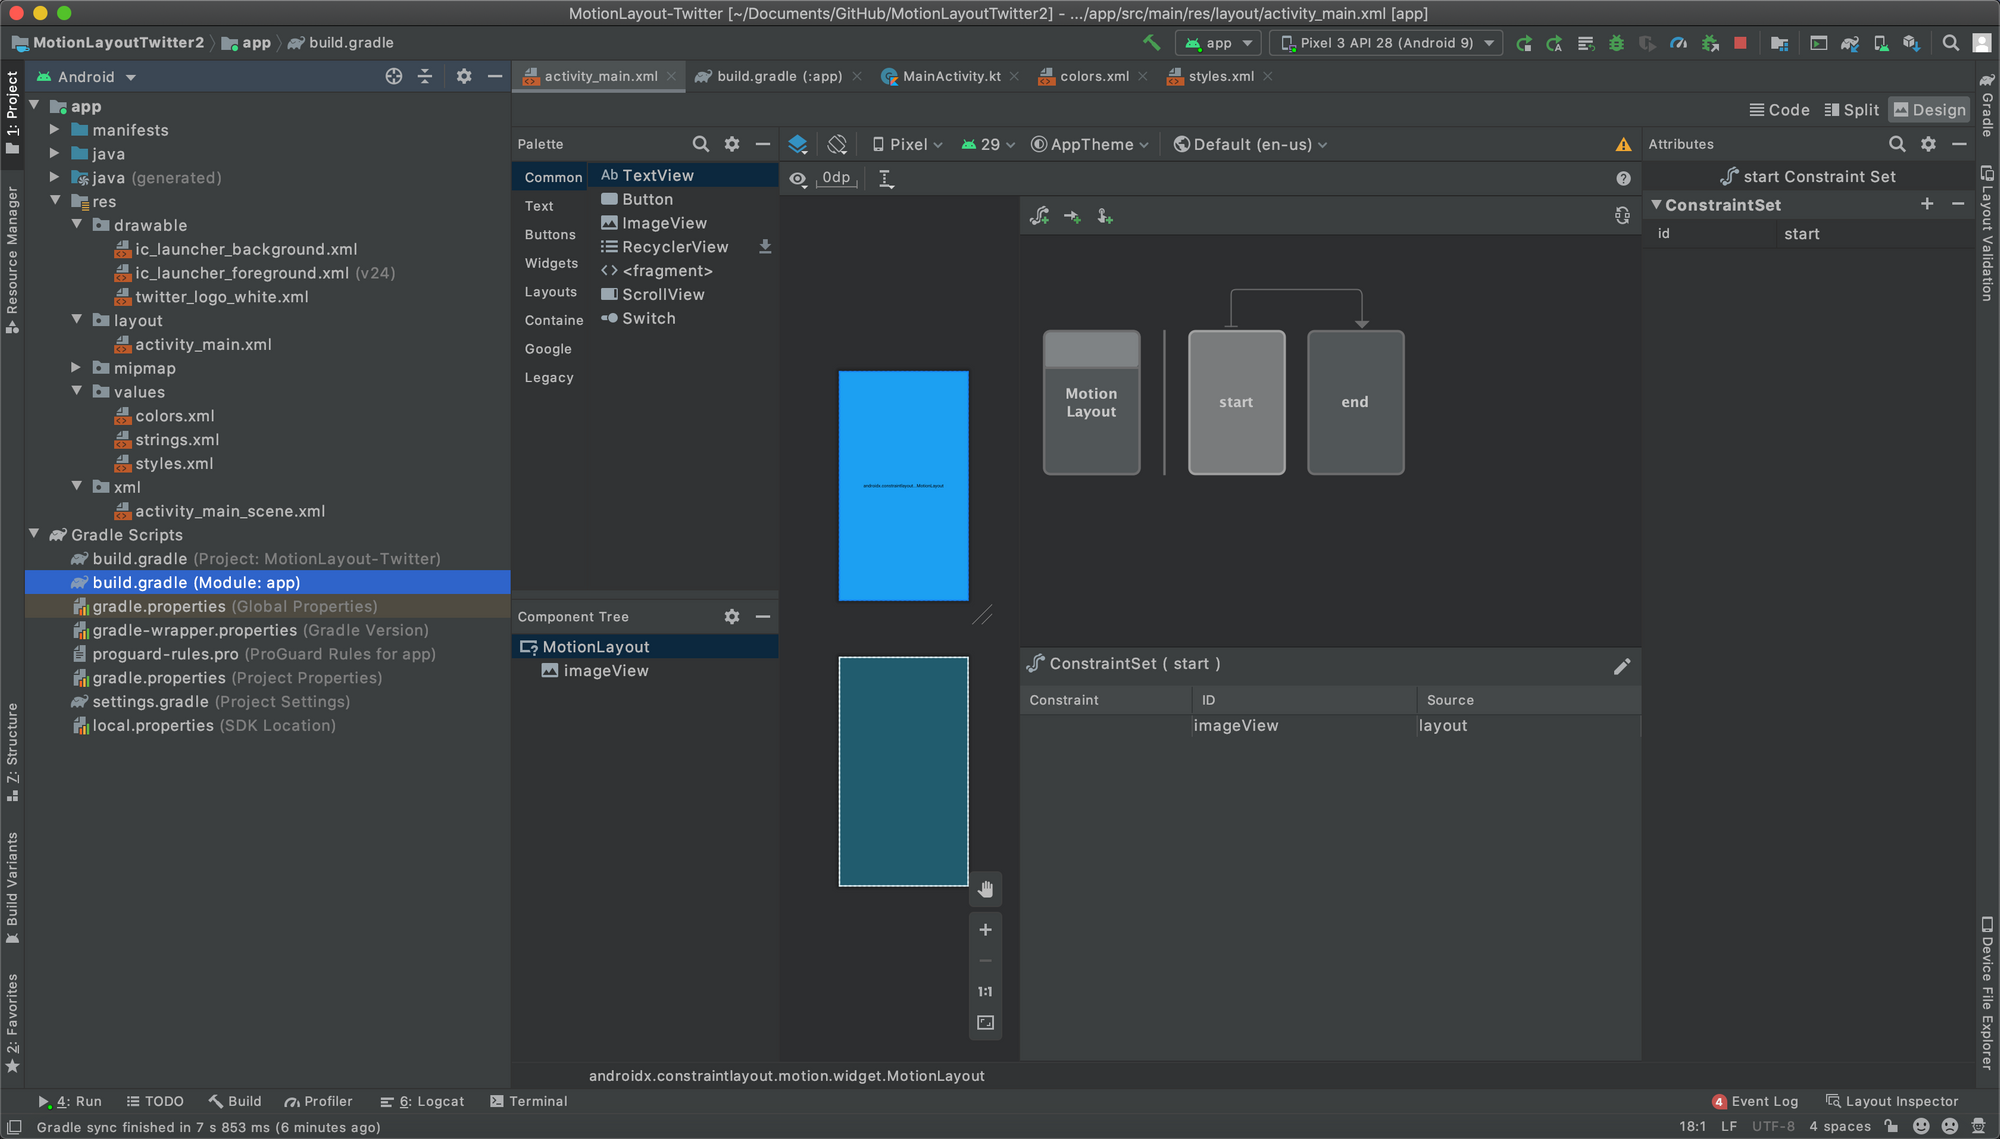
- While the
activity_main.xmlis opened under the Design view, click the arrow between start and end ConstraintSets to open the Transition timeline:
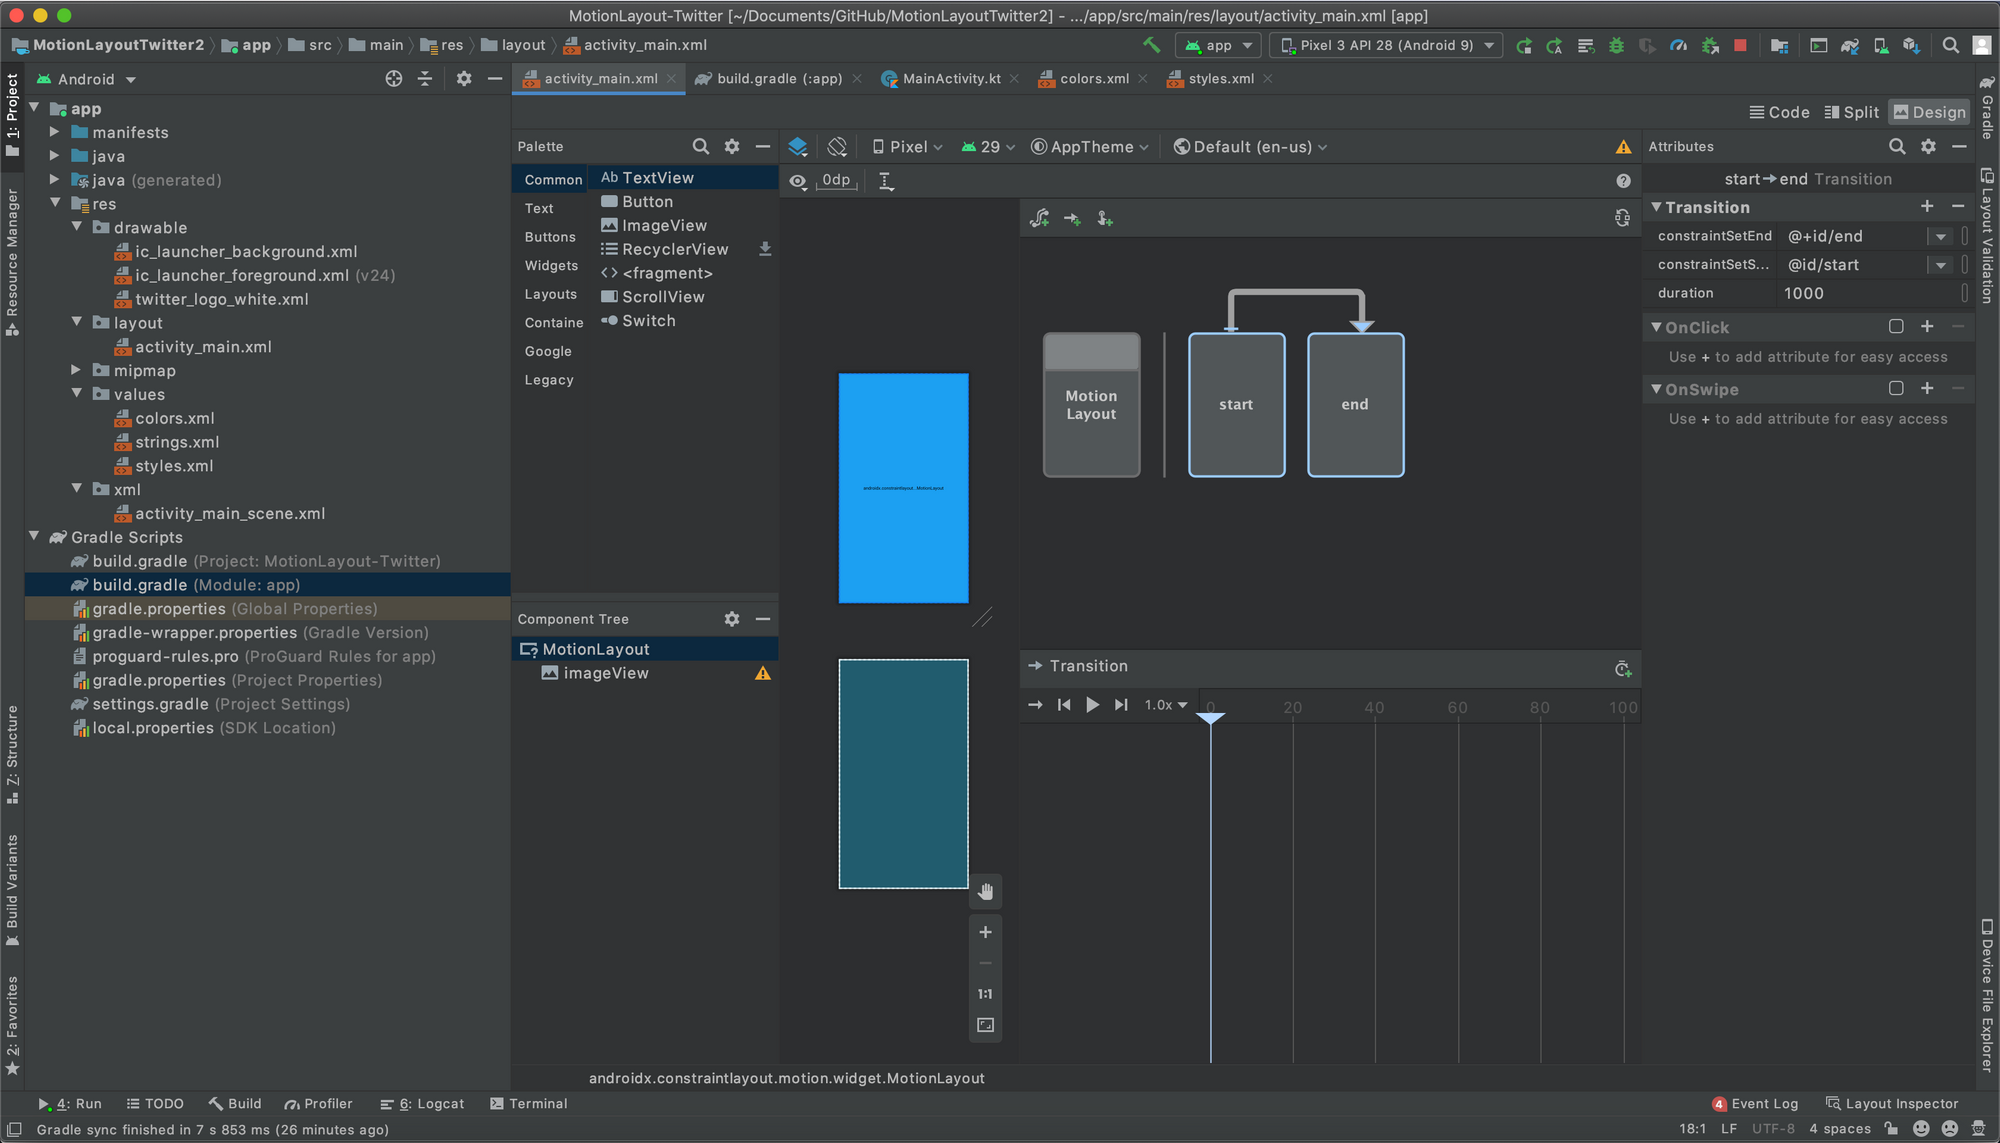
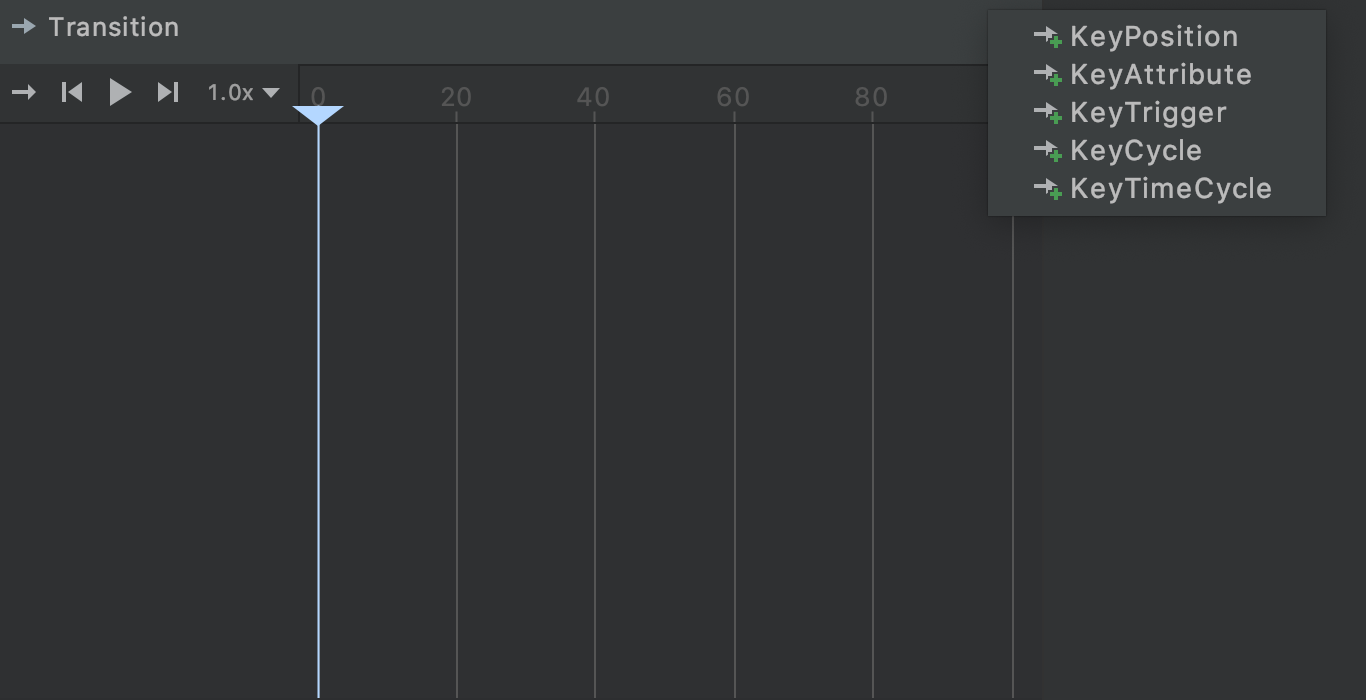
2. Click the Create Keyframes icon at the top right of Transition timeline and click KeyAttribute:
3. Select imageView from ID, Set Position to 0, and Attribute to scaleX.
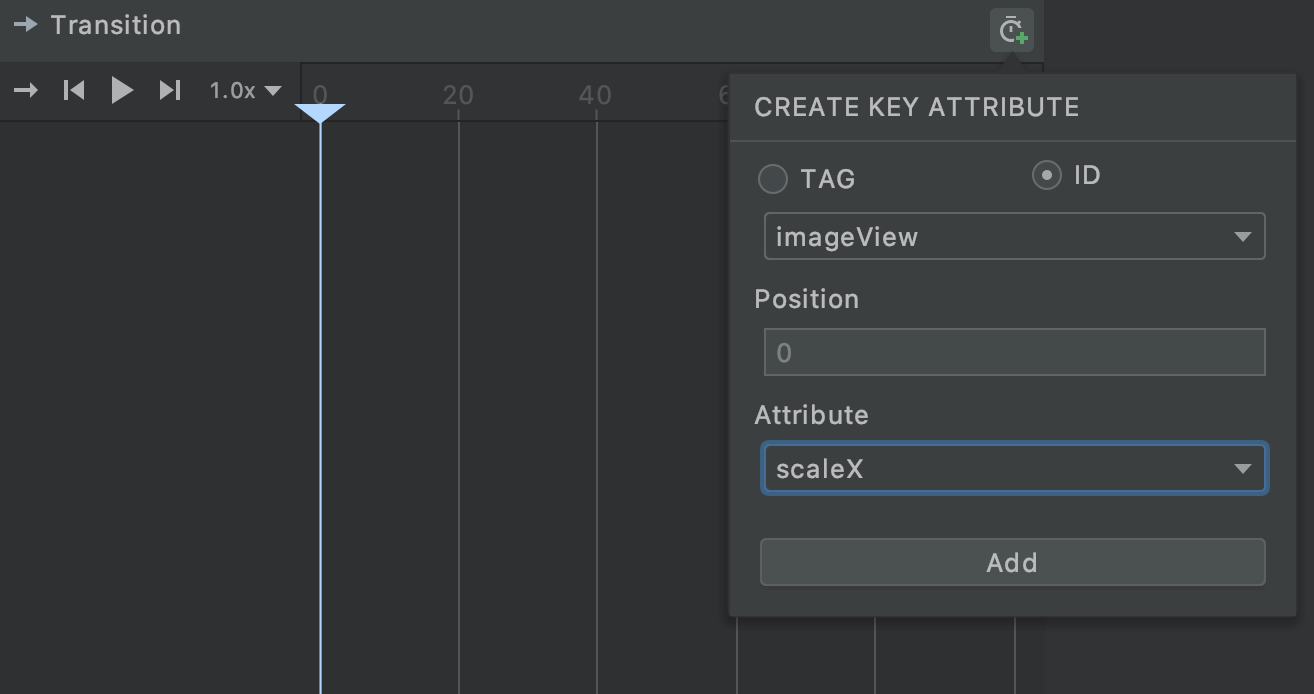
4. Repeat the same for scaleY.
5. Add two another KeyAttributes for scaleX and scaleY with Position 20.
6. Click on each diamonds for scaleX and scaleY at Position 20 and in the Attributes section, change the scaleX and scaleY to 0.7 (this achieves the scaled down motion from position 0 to 20).
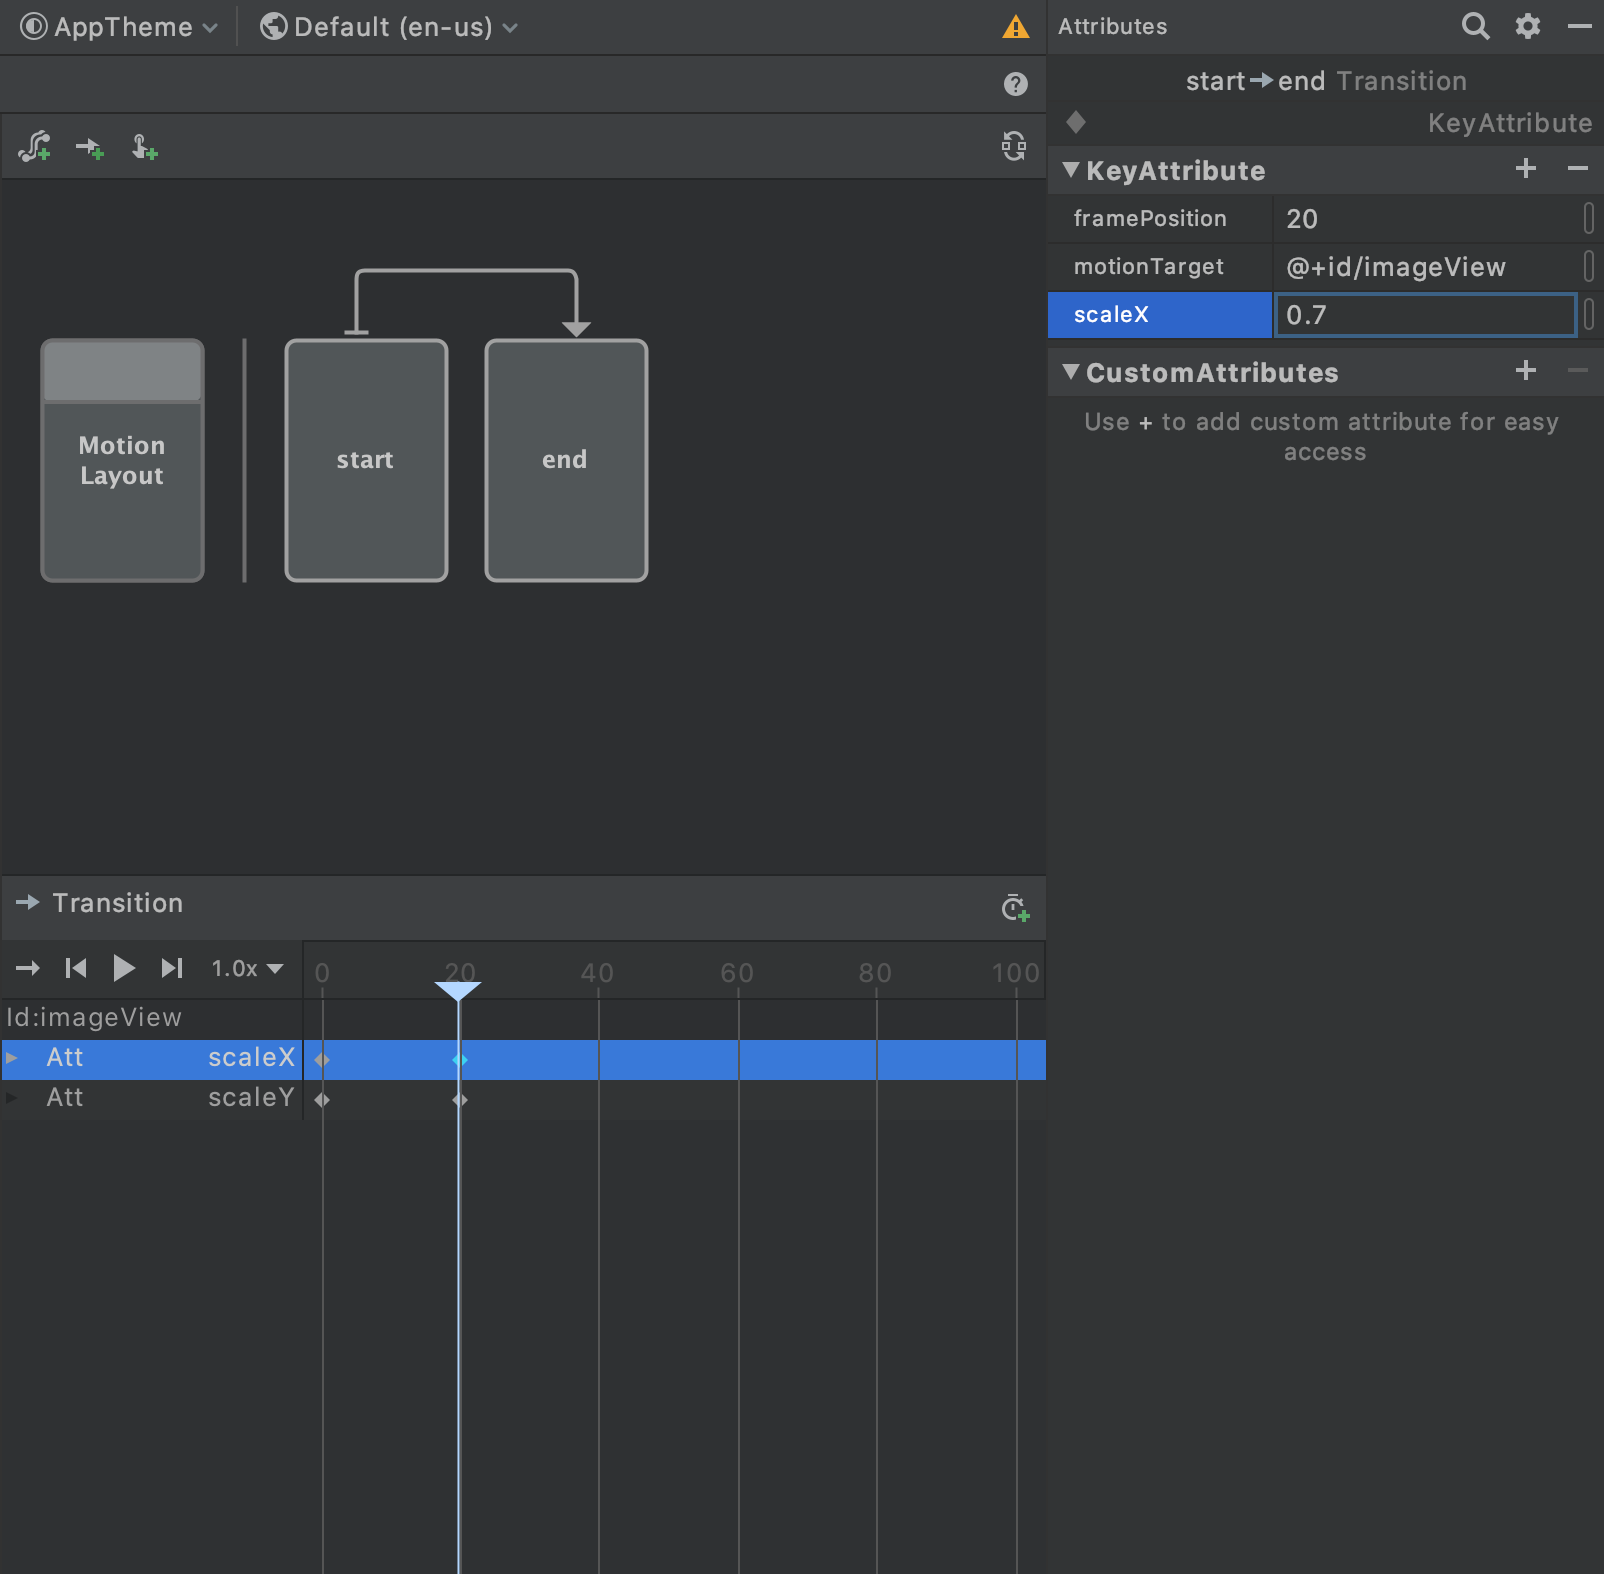
7. Add two new KeyAttributes for both the scales at Position 40 and keep their scales to 0.7 (this achieves the rest period of the logo from position 20 to 40 before the huge scaled up motion).
8. Add two new KeyAttributes for both the scales at Position 100 and set their scales to 50.0 (this achieves the final scaled up effect that fills the whole screen)
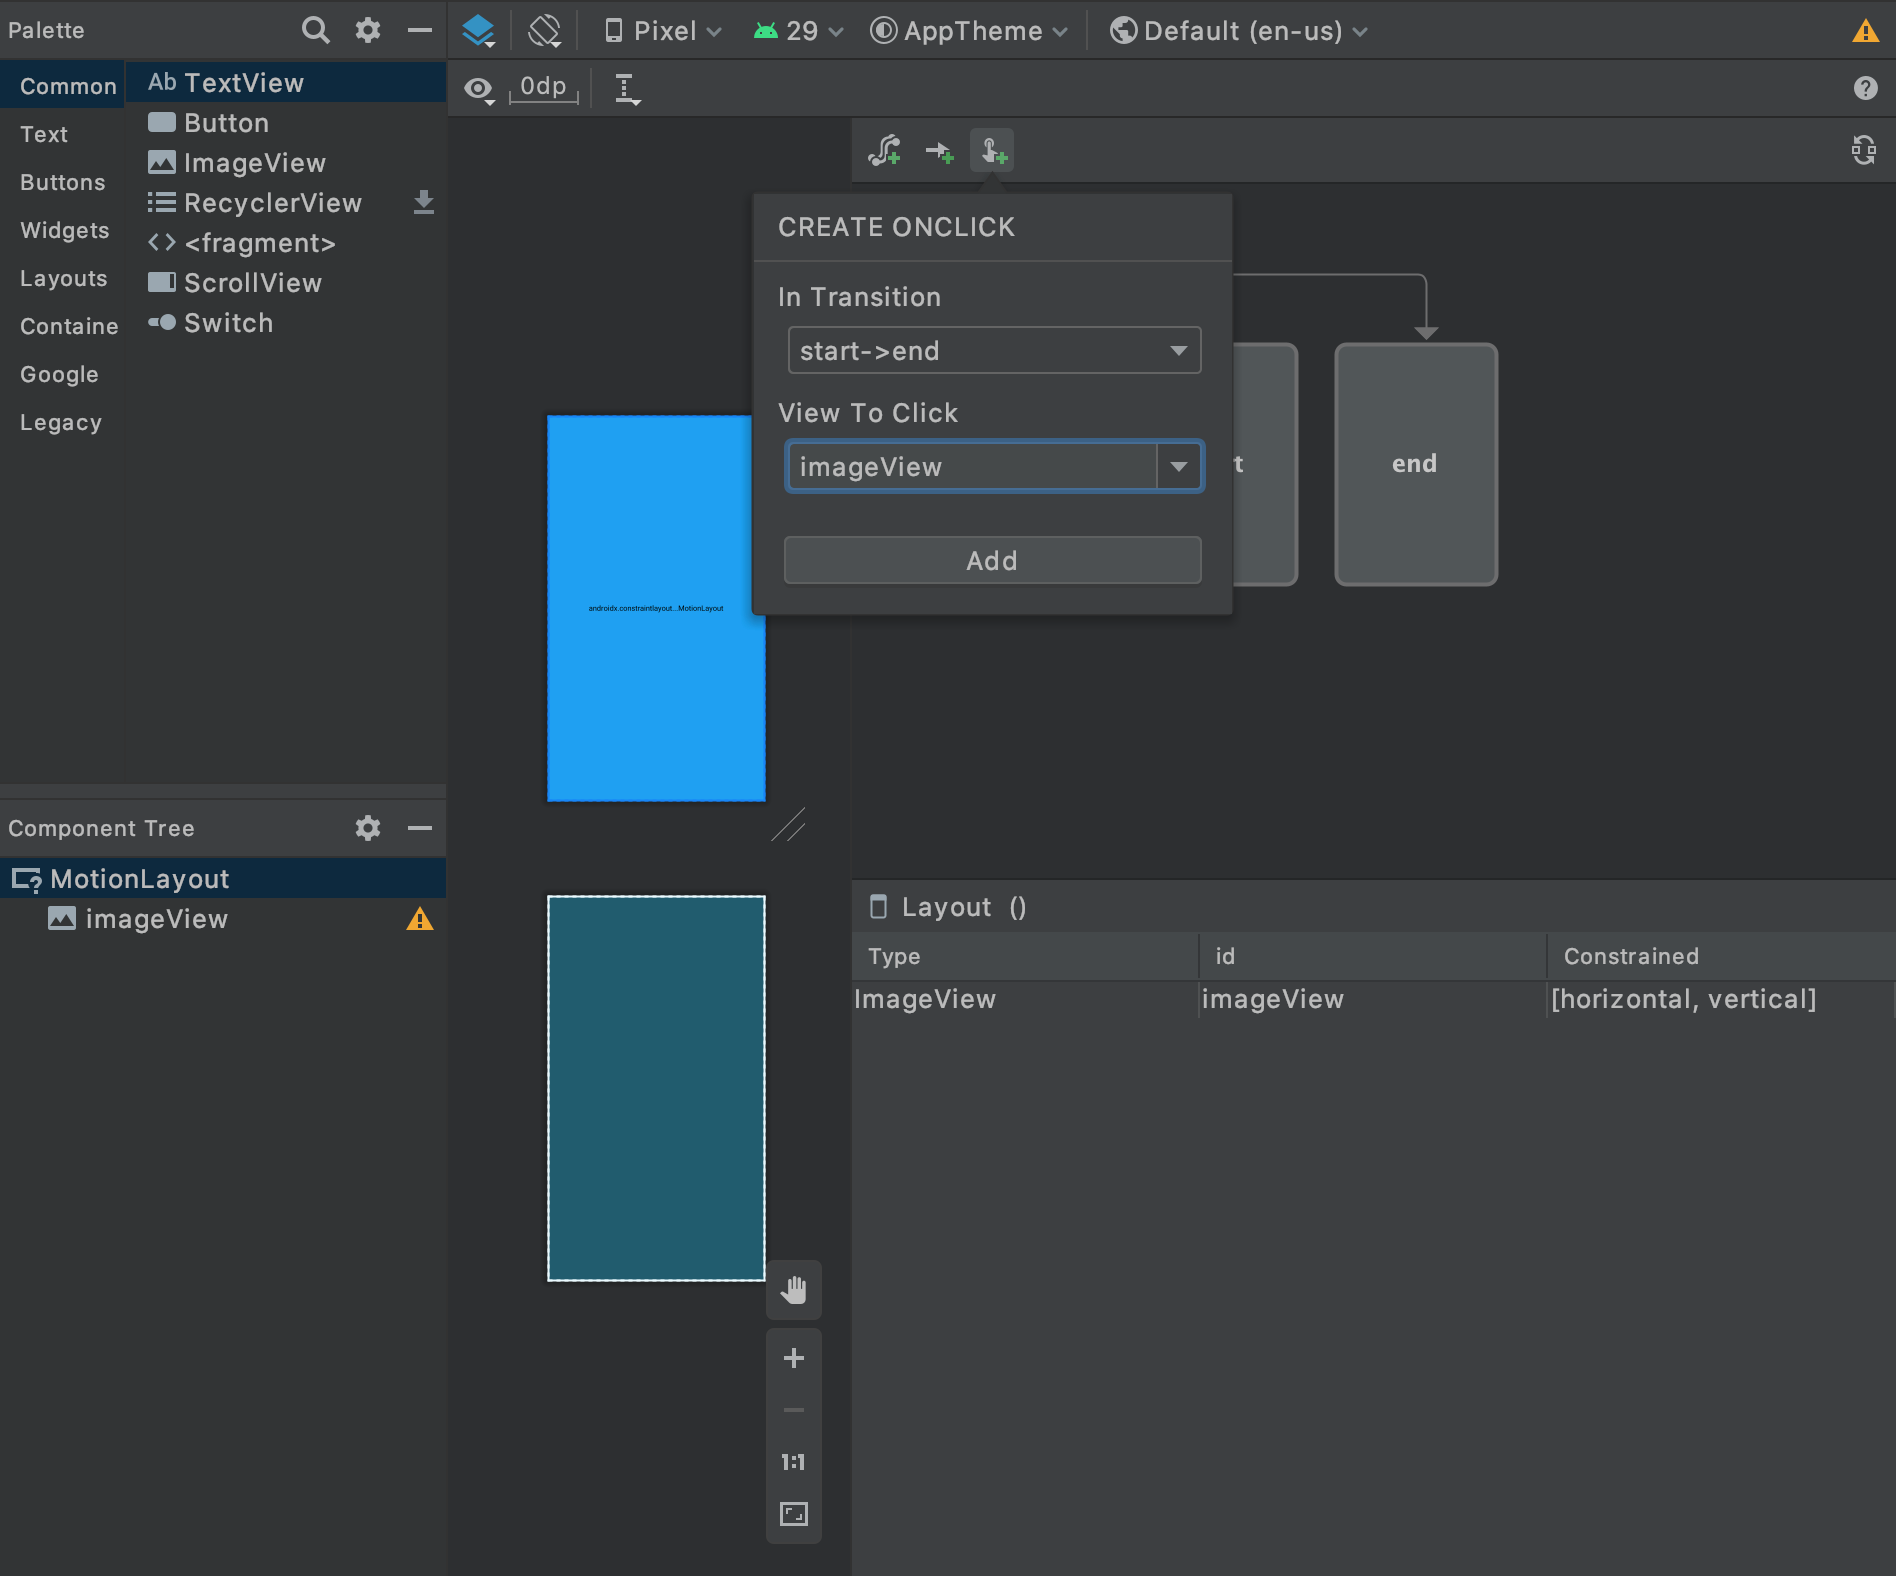
In order to see if we’ve done the animation right, we’re going to trigger it with a click on the imageView, and for that:
- Select the Click Handler
- In the popup that opens, select imageView as the View to Click.
Run the app, click the little white bird, and voilà! 🎉 Here’s your newly constructed animation using MotionLayout:

If you’re curious how’s this all achieved with just a few clicks of a button, you need to see how this was all done behind the scenes by opening the activity_main_scene.xml to look at the modified file where you can make further tweaks to the animation for further perfection:
Up Next
I did not initially plan to write about this, but I received a couple of questions after posting this story on how to move to next activity after the transition is completed, which got me into writing a Part II for this post:
 Waseef Akhtar
Source code for the Final Version
 waseefakhtar
Happy coding! 💻
Have something to say? Leave me comments on Twitter, retweet, like or follow: ✌️
I just published "Android MotionLayout: Creating the Twitter splash screen in the simplest way possible" https://t.co/YzfcKlmzsr#AndroidDev #Kotlin #MotionLayout #100DaysOfCode
— Waseef Akhtar (@waseefakhtar) May 7, 2020
If you enjoyed this, you might also be interested in other stories that I recently published:
Waseef Akhtar